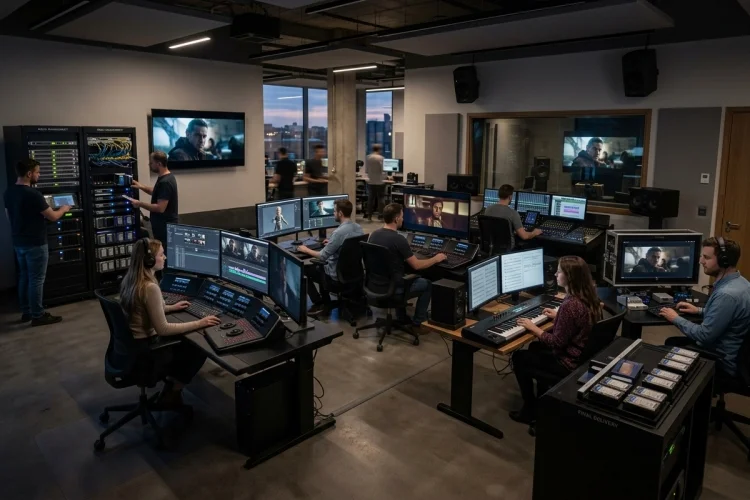
Filming may be finished, but the movie is far from complete. The camera files still contain repeated takes, technical mistakes, unfinished effects, separate audio recordings, and many shots that will never appear in the final version.
Post-production is where all that raw material becomes a finished story. Editors choose performances and shape the pacing, sound teams build the acoustic world, visual-effects artists complete impossible images, and colourists create a consistent visual style.
The complete post-production workflow usually includes media management, picture editing, visual effects, sound post-production, music, colour grading, quality control, and final delivery.
These stages are often described in order, but real projects may overlap. A composer might begin while the editor is still revising scenes, and visual-effects artists may work on selected shots before picture lock.
Whether you are making a short film, documentary, commercial, or feature, understanding this process will help you organise your files, communicate with collaborators, and avoid expensive problems near the deadline.
What Happens During Post-Production?
Post-production is the stage where recorded image and sound are organised, edited, enhanced, mixed, and prepared for audiences. It begins once footage starts entering the editorial system, which may happen during the shoot rather than only after filming ends.
The process is highly collaborative. Editors, assistant editors, directors, producers, sound professionals, composers, colourists, visual-effects teams, and graphic designers may all contribute to the finished project.
Adobe describes post-production as the point where editing, colour, music, sound mixing, motion design, and other elements come together.
The exact workflow depends on the production. A simple online video might be completed by one person, while a feature film may use several specialist companies and departments.
However, the central goal remains the same: transform disconnected production material into a technically reliable and emotionally effective viewing experience.
Stage 1: Ingest, Back Up, and Organise the Media
The first step is bringing camera footage, production audio, graphics, and other assets into a secure working system. This process is often called ingesting.
Files should be copied and backed up before anyone begins making major changes. A filmmaker should never rely on a single memory card or hard drive as the only copy of important material.
The assistant editor or editor then creates an organised project structure. Footage may be grouped by shooting day, scene, camera, location, or file type.
Audio is synchronised with the picture, while notes from the script supervisor help identify preferred takes and continuity information.
Large or high-resolution camera files can be demanding to edit. In that case, the team may create smaller proxy files that are easier for the computer to play. The original high-quality media is reconnected later for finishing and export.
ScreenSkills describes assistant editors as the people who manage editorial workflows, organise materials, and prepare everything the editor needs to work efficiently.
Good organisation may not feel creative, but it protects the entire workflow. Poor file naming and missing media can delay every department that follows.
Stage 2: Build the Assembly and Rough Cut
Once the media is prepared, the editor begins assembling scenes. An early assembly normally places the available material in approximately the order shown in the screenplay or story outline.
This version is often long and uneven. It may contain repeated actions, temporary sound, missing effects, and several alternative performances. Its purpose is to reveal what was actually captured during production.
The editor then develops a rough cut. At this stage, the main concern is story rather than polish. The editor and director evaluate structure, performances, clarity, pacing, and emotional impact.
Adobe describes a rough cut as an early version that establishes the film’s main flow before final sound, colour, and effects are completed.
How Editing Can Change a Scene
Imagine a character entering an empty house. Long shots, quiet pauses, and delayed information could make the sequence feel suspenseful.
The same footage could become more energetic through shorter shots and faster reactions. The editor is not merely arranging images; they are controlling how the audience receives information.
Editors may also remove entire scenes, combine separate moments, or move information to a different part of the film. A beautifully shot sequence may still be cut when it slows the story or repeats something viewers already understand.
Stage 3: Refine the Edit and Reach Picture Lock
The rough cut gradually becomes a fine cut. Shot choices become more precise, pauses are adjusted, transitions are refined, and temporary sound or music may be added to test the intended rhythm.
Feedback sessions often take place during this stage. The director, producer, editor, and sometimes test viewers identify confusing sections, weak transitions, or moments that need more emotional space.
The editor must balance many priorities. A scene may contain a powerful performance but also slow down the plot. Another may be necessary for information but feel emotionally flat.
ScreenSkills notes that editors assemble scenes according to the script while shaping story with sound effects, music, performance, and available coverage.
Eventually, the production reaches picture lock. This means the order and duration of the images are approved and should no longer change significantly.
Picture lock matters because sound, visual effects, music, subtitles, and colour work all depend on precise timing. Changing the edit later can require several departments to redo completed work.
Stage 4: Complete Visual Effects, Titles, and Graphics
Visual effects may include removing unwanted objects, replacing screens, cleaning up frames, extending locations, creating weather, or building entire digital environments.
Some effects work begins before picture lock, especially when complex shots require a long production schedule.
However, teams usually avoid completing expensive final renders for shots that may still be removed from the edit. Adobe notes that productions often wait to finalise costly effects until they are confident the shots will remain in the finished cut.
Temporary placeholders may appear in the edit while final work is underway. Each visual-effects shot then moves through reviews until the director and supervisors approve it.
Titles and graphics are also added during this phase. These can include opening credits, subtitles, maps, text messages, news reports, signs, and end credits.
Every graphic should match the film’s design language. A futuristic thriller, period drama, and casual documentary require very different typography and motion.
Stage 5: Build the Soundtrack
Sound post-production usually begins with organising and cleaning the recorded dialogue. Editors select the best microphone tracks, reduce unwanted noise, and smooth transitions between different takes.
Unusable dialogue may be rerecorded through ADR, while Foley artists recreate footsteps, clothing movement, object handling, and other physical details.
Sound-effects editors build environments using traffic, weather, crowds, machines, animals, doors, and designed elements. Background ambience makes locations feel continuous and believable.
A supervising sound editor coordinates this workflow, including dialogue editing, ADR, Foley, sound effects, pre-mixing, and the final mix.
Music may be composed specifically for the film or licensed from existing recordings. The music editor and composer work with the director to make sure each cue supports the emotion without overwhelming dialogue or performance.
During the final sound mix, dialogue, ambience, effects, Foley, and music are balanced together. The team also creates perspective: a voice heard from another room should sound different from one spoken directly beside the camera.
Stage 6: Colour Correction and Colour Grading
Colour correction balances the footage so shots recorded with different cameras, lenses, locations, or lighting conditions appear consistent.
Skin tones, brightness, contrast, and white balance may need adjustment. A close-up filmed under cloud cover should not suddenly look unrelated to the wide shot captured in sunlight.
Colour grading then develops the creative appearance. The colourist may make the film feel warmer, colder, softer, more saturated, or more restrained according to the story.
The director and cinematographer often participate in this process to protect the visual style established during filming.
Adobe places colour work among the major finishing stages of post-production, while Blackmagic Design separates media management, editing, effects, colour, audio, and delivery into connected workflow areas.
Grading should support the narrative rather than simply apply a fashionable preset. A colour shift can help distinguish time periods, locations, memories, or changes in a character’s emotional state.
Stage 7: Quality Control and Final Delivery
Before release, the completed film must be checked carefully. Quality control includes looking for missing frames, spelling errors, audio distortion, visual glitches, incorrect subtitles, inconsistent levels, and synchronisation problems.
The project may require several export versions. A cinema master, streaming file, television version, festival screener, social media cut, and archival master can all have different technical requirements.
The team must confirm resolution, aspect ratio, frame rate, audio format, codec, colour space, captions, and file naming before delivery. Exporting the wrong format can create playback problems even when the creative work is excellent.
Watch the final file from beginning to end rather than assuming a successful export is automatically correct. Test it on the type of device or platform where the audience will see it.
Project files, masters, graphics, audio sessions, and important source material should also be archived clearly. A production may need new subtitles, trailers, restorations, or platform versions years later.
The complete post-production workflow turns raw recordings into a finished film through organisation, editing, visual effects, sound design, music, colour grading, quality control, and delivery.
Each stage depends on the work completed before it. Organised media makes editing easier, picture lock protects sound and effects schedules, and careful quality control prevents technical problems from reaching audiences.
For your next project, plan post-production before the shoot begins. Decide how files will be stored, which software and formats will be used, and who is responsible for each stage.
Then follow the workflow step by step instead of rushing directly towards the final export. A strong post-production process does more than polish a film-it helps the story reach its full potential.